WELCOME TO BHATI TRICKS WRITE FOR US ADVERTISE YOUR BLOG/SITE HERE POST YOUR ARTICLE/TRICK HERE


Showing posts with label TIPS. Show all posts

Tuesday, 27 August 2013

HIDE YOUR PRIVATE DATA IN MOBILE WITHOUT SOFTWARE- A KILLER TRICK

0 comments
HIDE YOUR PRIVATE DATA IN MOBILE WITHOUT SOFTWARE- A KILLER TRICK
hide-private-data

ONE of our reader submit their problem about to hide the private data in their Symbian phone. After a lot of trying i get a solution by which you can hide your personal data in your phone. Many times you have to hide your personal data  like videos, audio files from your friends, parents, or relatives.

Yes you can hide any file or folder in your java/ Symbian phone without any software or efforts by a simple trick.
READ MORE:


 NOTE: THIS Trick is not applicable for android phones.
for hide data in android phones, you can use many apps like hide-my-secret.
So without wasting of time, lets start and follow the steps:-


  • Step 1:- Create a folder in your micro SD card,.
  • Step 2:- Rename it to any name with the exact extension .jad like songs.jad .
  • Step 3:- Put your personal files, folder in that folder.
  • Create any new folder or you can use any existing folder that is to be hidden.
  • Step 4:- Now create a new folder in same directory with same name with extension .jar . like songs.jar.
  • Step 5:- Now the task is totally completed, you will see that the folder with extension .jad gets hidden only folder of .jar extension is visible which is empty, and your data is totally protected from unwanted peoples.

TO GET YOUR PERSONAL DATA BACK:
To get your personal data, delete the folder with .jar extension, and your personal data becomes visible.
please post your opinion for that post in comment box, and subscribe us for latest updates on blogging and computer tricks.

Tuesday, 13 August 2013

IMPORTANT WINDOWS SHORTCUTS THAT EVERY COMPUTER USER MUST KNOW

0 comments
keyboard-shotcuts-all-windows

windows-keyboard-shortcutsIMPORTANT WINDOWS SHORTCUTS THAT YOU MUST KNOW


Hi! Friends, Today I am sharing a new article about the IMPORTANT SHORTCUTS THAT YOU MUST KNOW. shortcuts help in fast working, and saves a lot of time on PC. 
YOU MAY ALSO LIKE:-


Windows have many bunch of shortcuts. Before going ahead please take a review on some basics. CTRL is used for control, ALT and SHIFT are the modifier keys.
SO NOW LETS START:-
Shortcut KeysSupported Window VersionsDescription
Alt + e95, 98, ME, NT, 2000, XP, VistaPull down the top Edit menu.
Alt + f95, 98, ME, NT, 2000, XP, VistaPull down the top File menu
Ctrl + a95, 98, ME, NT, 2000, XP, VistaSelect all text.
Ctrl + c95, 98, ME, NT, 2000, XP, VistaCopy selected item(s) (to clipboard).
Ctrl + f95, 98, ME, NT, 2000, XP, VistaFind.
Ctrl + v95, 98, ME, NT, 2000, XP, VistaPaste copied item(s) from clipboard
Ctrl + x95, 98, ME, NT, 2000, XP, VistaCut.
Ctrl + Ins95, 98, ME, NT, 2000, XP, VistaSame as Ctrl + c
Ctrl + (left arrow)95, 98, ME, NT, 2000, XP, VistaMove one word to the left at a time.
Ctrl + (right arrow)95, 98, ME, NT, 2000, XP, VistaMove one word to the right at a time.
Shift + Ins95, 98, ME, NT, 2000, XP, VistaSame as Ctrl + v
Shift + Delelte (or Del)95, 98, ME, NT, 2000, XP, VistaCut. Or permanently delete selected item(s) on Windows Explorer.
F195, 98, ME, NT, 2000, XP, VistaHelp.
Home95, 98, ME, NT, 2000, XP, VistaJump to the beginning of the line or page.
Ctrl + Home95, 98, ME, NT, 2000, XP, VistaJump to the beginning of the document or page.
End95, 98, ME, NT, 2000, XP, VistaJump to the end of the line or page.
Ctrl + End95, 98, ME, NT, 2000, XP, Vistaump to the end of the document or page.
Shift + Home95, 98, ME, NT, 2000, XP, VistaSet selection (highlight) from current position to beginning of the line or page.
Shift + End95, 98, ME, NT, 2000, XP, VistaSet selection (highlight) from current position to end of the line or page.
Shift + (left arrow)95, 98, ME, NT, 2000, XP, VistaSet selection (highlight) from current position to the left, one character at a time.
Shift + (right arrow)95, 98, ME, NT, 2000, XP, VistaSet selection (highlight) from current position to the right, one character at a time.
Shift + (down arrow)95, 98, ME, NT, 2000, XP, VistaSet selection (highlight) from current position to the next line down.
Shift + (up arrow)95, 98, ME, NT, 2000, XP, VistaSet selection (highlight) from current position to the next line up.
PLEASE SUBSCRIBE US FOR  LATEST UPDATES. AND WAIT FOR OUR NEW ARTICLES.
DON'T FORGET TO SHARE THAT ARTICLE WITH YOUR FRIEND.

Wednesday, 7 August 2013

DISPLAY NOTICE ON STARTUP IN WINDOWS

0 comments
DISPLAY-NOTICE-ON-START-UP-IN-WINDOWS
IN THAT ARTICLE YOU WILL FOUND THAT HOW TO DISPLAY A NOTICE ON START-UP  ON THE DEMAND OF A READER OF OUR SITE.If your PC has multiple users then you can now display legal notice to every user before they login to your PC. This legal notice will be displayed at every startup just before the Desktop is loaded. Using this you can tell your friends about the do’s and dont’s in your computer when they login in your absence. Well you can do this pretty easily. For this there is one small registry hack. Here is the step-by-step instruction to do this. 

STEP 1. Go to Start->Run, type regedit and hit ENTER

STEP 2. Navigate to the following key in the registry
HKEY_LOCAL_MACHINE\SOFTWARE\Microsoft\Windows\CurrentVersion
\policies\system
On the right side pane look for “legalnoticecaption“, double click on it and enter the desired Legal Notice Caption.

STEP 3. Next below this look for “legalnoticetext” and enter the desired Legal Notice Text. The legal notice text can be up to a page in it’s size so that it can include a set of do’s and dont’s for your computer.

STEP 4. After you do this just restart your computer and upon the next startup you can see the legal notice information for your computer. This trick works on both XP and Vista. You can also try it on Windows 7 and should work with no problems.
PLEASE FEEL FREE TO POST COMMENTS BELOW THE POST.

Saturday, 27 July 2013

SHUT DOWN YOUR PC IN ACCURATE 10 SECONDS

0 comments
shut-down-computer-in-only-10-seconds

HI FRIENDS, In this article i will tell you that how to shutdown system in only 10 seconds. It is applicable for all windows system.
STEP1: Open run box (by pressing  win+R)
STEP2: Type REGEDIT in text box.
STEP3: Navigate to
 HKEY_LOACAL_MECHINE\SYSTEM\Cur rentControlSet\Contr ol\ContentIndex
STEP4: N ow there find the Key Called
“Startup Delay”
STEP5: Double Click On It,Now where its Base Click Decimal
STEP6: Now its Default Value Is 4800000 (75300:hexadecimal),Change The Value To 40000
Now close the Registery Editor and,Restart Your Computer,You’ll See The Result
NOTE: please subscribe us, for latest updates.

Friday, 19 July 2013

HIDE YOUR PERSONAL DATA BEHIND A IMAGE

0 comments
HIDE YOUR PERSONAL DATA BEHIND A IMAGE
IN THAT POST I WILL TELL YOU THAT HOW CAN YOU HIDE YOUR DATA FROM OTHERS IN YOUR COMPUTER. Really it is a fantastic trick. In your computer, there are many important files or documents you want to hide from your friends and others. In this trick you will found that how can you hide your personal data behind the images. When anyone open it, then he will see only image.
So now lets start, to hide your data behind a image, please follow the steps:-
STEP1:- firstly download WINRAR from here :-WINRAR, and install it.
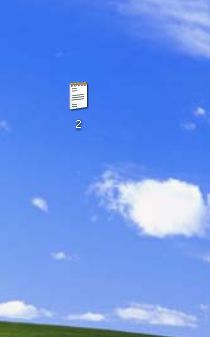
STEP2: copy a particular image(say 1.jpg) to be used for hiding data behind it. on desktop
HIDE-YOUR-PERSONAL-DATA-BEHIND-A-IMAGE

STEP3:-now select your personal file(say 2.txt) to hide behind that image.
HIDE-YOUR-PERSONAL-DATA-BEHIND-A-IMAGE 
Archive it with WINRAR, by right click on it.(make it in .rar format).And paste it on desktop(say 2.rar).

HIDE-YOUR-PERSONAL-DATA-BEHIND-A-IMAGE
STEP4:-now open the command line by typing cmd in run box. Or (start>accessories>command prompt).
HIDE-YOUR-PERSONAL-DATA-BEHIND-A-IMAGE

STEP5:-type the following command in command line:-
cd desktop

HIDE-YOUR-PERSONAL-DATA-BEHIND-A-IMAGE

NOTE: CD is used for change the directory.
STEP6:- now type the highlighted command in command line(note: put spaces at right places):-
Copy /b imagename.jpg + filename.rar finalimage.jpg

IN THE ABOVE COMMAND CHANGE:-
imagename.jpg by image name you want to hide the document behind the image.
Filename.rar by your personal document name(say 2.rar).
Finalimage.jpg by your final image. This is the image(SAY 3.jpg) where your document will be hidden.
EXAMPLE:-
Copy /b 1.jpg + 2.rar 3.jpg

AND PRESS ENTER. NOW A NEW FILE WILL BE GENERATED ON DESKTOP.(SAY 3.JPG)
HIDE-YOUR-PERSONAL-DATA-BEHIND-A-IMAGE
NOTE:THE TASK IS TOTALLY COMPLETED.NOW WHEN YOU OPEN THE FINAL IMAGE(3.jpg) IT WILL OPEN AS NORMAL IMAGE.
FOR OPEN YOUR HIDDEN FILES BEHIND THAT IMAGE, FOLLOW THE STEPS:-
STEP1:-open WINRAR, and click on file>open.
HIDE-YOUR-PERSONAL-DATA-BEHIND-A-IMAGE

STEP2:-here open your final image (say 3.jpg).OR YOU CAN DRAG IT DIRECTLY TO THE WINRAR. And it will display your personal document.
HIDE-YOUR-PERSONAL-DATA-BEHIND-A-IMAGE

NOW YOU CAN HIDE YOUR PERSONAL DATA LIKE VIDEOS, TEXT FILES BEHIND ANY IMAGE BY THAT SIMPLE TWEAK.
IF YOU HAVE ANY PROBLEM REGARDING THAT POST, PLEASE LEAVE A COMMENT FOR US. AND PLEASE DONT FORGET TO SHARE THAT POST WITH YOUR FRIENDS.


HOW TO MAKE A NAMELESS AND IMAGELESS FOLDER

0 comments
MAKE-A-NAME-LESS-AND-IMAGE-LESS-FOLDER

HI FRIENDS, In that post I am sharing a trick about “HOW TO MAKE A NAMELESS AND IMAGE-LESS FOLDER”. It is a simple tweak for your friends. This trick will allow you to make folder without any name and image. This trick is applicable for all windows systems.
SO, NOW LETS START, TO MAKE A NAMELESS AND IMAGE LESS FOLDER, FOLLOW THE STEPS:-
Step1:- Make a new folder on desktop or on other places.
MAKE-A-NAME-LESS-AND-IMAGE-LESS-FOLDER

Step2:- Right click on it and select rename.
MAKE-A-NAME-LESS-AND-IMAGE-LESS-FOLDER

Step3:-Erase the text in text box, and now keep pressing alt key and type 255, and then release the alt button.
MAKE-A-NAME-LESS-AND-IMAGE-LESS-FOLDER

NOTE:- LAPTOP USERS NEED TO ENABLE   NUM LOCK.
Step4:- For removing the folder image, right click on folder and select properties.
MAKE-A-NAME-LESS-AND-IMAGE-LESS-FOLDER

Step5:- IN customize tab select the change icon menu. A new window will open. Now there search for a blank image. And select it.
MAKE-A-NAME-LESS-AND-IMAGE-LESS-FOLDER


Step6:- Press OK.
DONE! YOU HAVE CREATED A FOLDER..

IF YOU HAVE ANY PROBLEM REGARDING THIS POST THEN PLEASE LEAVE A COMMENT BELOW THE POST.

Wednesday, 26 June 2013

10 TIPS THAT MAKES YOUR SYSTEM FASTER

0 comments
10-TIPS-THAT-MAKES-YOUR-SYSTEM-FASTER

Have you noticed that many times, your system runs slower than before?
In this article, I hope to compile a list of 10 tips that can be used to get rid from slow pc.
By following these tips you can maintain your system, increase its processing speed, and running smoothly.
10 TIPS THAT MAKES YOUR SYSTEM FASTER
1. You can refresh the system by pressing F5 after the closing of any application, due to which unused files are removed from the RAM.
2. Do not place a lot of shortcuts on desktop. Each shortcut on desktop consumes 500-600 bytes of RAM.

10-TIPS-THAT-MAKES-YOUR-SYSTEM-FASTER

3. Do not set the large size image as your desktop background wallpaper.
4. Do not execute any application before the system completely boots.
5. Empty the recycle bin regularly. You can use ccleaner software for it. The files are not permanently deleted from your hard drive until you remove the files from recycle bin.

10-TIPS-THAT-MAKES-YOUR-SYSTEM-FASTER
6. delete the temp files regularly(by typing the “%temp%” in run box)

10-TIPS-THAT-MAKES-YOUR-SYSTEM-FASTER
7. do not forget to defragment your hard drive once in 15-20 days. This will save a lot of space on your hard drive and rearrange the files, so that applications run smoothly.

10-TIPS-THAT-MAKES-YOUR-SYSTEM-FASTER
8. make maximum 2-3 drive in your system. Install large software like (Microsoft visual studio, matlab , orcad etc) in the second partition. Windows uses the entire free space as virtual memory. When your system’s RAM is full, keep the c drive as free as possible.

10-TIPS-THAT-MAKES-YOUR-SYSTEM-FASTER

9. when you are installing a new program, then do not enable a option of “having a tray icon”. Because the tray icon use the available RAM. And slow down the booting speed of system. Also do not enable the option “start automatically on start up”.
10.protect your pc from dust and moisture. Because dust causes the cpu fan to jam and to generate a noise, and decrease s it’s life.

Wednesday, 19 June 2013

C PROGRAMMING E-BOOK (K&R VERSION)

0 comments
C-PROGRAMMING-EBOOK

C LANGUAGE IS BASIC AND ESSENTIAL LANGUAGE. IT IS VERY EASY AND INTERESTING
Every program is limited by the language which is used to write it.
 C is a programmer’s language. Unlike BASIC or Pascal, C was not written as a teaching aid, but as an implementation language.
 C is a computer language and a programming tool which has grown popular because programmers like it! It is a tricky language but a masterful one. Sceptics have said that it is a language in which everything which can go wrong does go wrong.
 True, it does not do much hand holding, but also it does not hold anything back. If you have come to C in the hope of finding a powerful language for writing everyday computer programs, then you will not be disappointed.
 C is ideally suited to modern computers and modern programming.
This book is a tutorial. Its aim is to teach C to a beginner, but with enough of the details so as not be outgrown as the years go by.
 It presumes that you have some previous acquaintance with programming — you need to know what a variable is and what a function is — but you do not need much experience. It is not essential to follow the order of the chapters rigorously, but if you are a beginner to C it is recommended.
YOU CAN DIRECT DOWNLOAD IT FROM HERE:-

Sunday, 16 June 2013

COMMAND PROMPT ON RIGHT-CLICK

0 comments
COMMAND-PROMPT-ON-RIGHT-CLICK
Sometimes it is necessary to launch command prompt window while the execution of PROGRAMS.And the main problem is that,when command prompt is open,the default path is the system path.Then user will have to do type “cd/” command to change the working directories.In this tutorial you will learn that how to add an option called “command prompt” on right click on a folder.It is just a simple Registry editing.When user click on this option ,then command prompt will launched with the path of selected folder To get the “command prompt” on right click,follow these steps:-
Step-1:Go to Start ,then click on Run,In the box,type "regedit" and press enter
COMMAND-PROMPT-ON-RIGHT-CLICK
Step-2: Go to the "HKEY_LOCAL_MACHINE\SOFTWARE\Classes\Folder\shell"
COMMAND-PROMPT-ON-RIGHT-CLICK
Step-3:Right click on "shell" and select and select new key Note:-Be sure that a new key is created under "shell". Now rename it to "Command Prompt"
COMMAND-PROMPT-ON-RIGHT-CLICK
Step-4:Right-click on "Command Prompt" and then select New Key
Step-5:Rename it to the "command"
COMMAND-PROMPT-ON-RIGHT-CLICK
Note: It is case sensitive
Step-6:Double-click on the "Default" on the right side of window
Step-7: Type the highlighted string in the text box
cmd.exe "%1"
COMMAND-PROMPT-ON-RIGHT-CLICK
Step-8:Click ok and refresh the registery by pressing F5,and enjoy
Note:-for better performance restart your system.


If you got stuck at any point,please leave a comment for us.

MAKE A MOVING BACKGROUND WALLPAPER

0 comments

MAKE A MOVING BACKGROUND WALLPAPER

In this post you will learn that how to create a moving wallpaper.
Moving background wallpapers is looking like a slide show.It is nothing,But a series of frames(images)And you can simply create it ,by photoscape. The photoscape’s other features like “screen capture”,“batch editor” ,“editor” ,“paper print” are also good features.You can create moving background of any size by PHOTOSCAPE.
To make a moving background wallpaper,follow the steps:
step 1:-Download the photoscape from" http://www.photoscape.org/",and install it.
step 2:-open photoscape,And click on "ANIMATED GIF"

MAKE-A-MOVING-BACKGROUND-WALLPAPER
step 3:-now drag here your images(more than 2).


MAKE-A-MOVING-BACKGROUND-WALLPAPER
step 4:-now you will see that,they are started moving,now ,change the transition time by clicking on "change time".Set the transition time according to the images

MAKE-A-MOVING-BACKGROUND-WALLPAPER
step 5:-Now you can change the effect by clicking on "change effect" in right side.

MAKE-A-MOVING-BACKGROUND-WALLPAPER
step 6:-And now change the size of wallpaper by dragging the slider in right side

MAKE-A-MOVING-BACKGROUND-WALLPAPER
step 7:-Finally,click on save.(it may be take long time for numbers of images),and enjoy
Note:-you can also edit it by opening it in Photoscape editor.
IF YOU HAVE ANY PROBLEM REGARDING IT,PLEASE LEAVE A COMMENT, AND SUBSCRIBE US FOR MORE UPDATES.


ABOUT THE AUTHOR

Founder & Author:I ABHISHEK BHATI student of COMPUTER SCIENCE by education a Blogger by profession. Exploring Technology is my passion.BHATI TRICKS is place for Tech Lovers. ABHISHEK BHATI launched his frist Marketing Site in 2013.
...Read More

GET FREE EMAIL UPDATES

Join us for free and get valuable content delivered right in your inbox.


recent comments

BHATI TRICKS Widget

| BHATI TRICKS © BHATI TRICKS. All Rights Reserved | | Back To Top |